Showing posts with label Fall. Show all posts

Tuesday, November 4, 2014

Muffuletta Sandwich for a Fall Picnic


THE BLUE RIDGE PARKWAY is scenic highway which runs from the boundary between The Great Smoky Mountains National Park and the Cherokee Indian Reservation in North Carolina to The Shenandoah National Park in Virginia.

The Parkway is a product of the New Deal's efforts to provide jobs to the unemployed during the Great Depression of the 1930's. Construction began in September, 1935, took 52 years to complete, and runs for 469 miles.

The Blue Ridge Parkway is my favorite part of living where we do. While driving the parkway, you encounter 26 mostly hand dug tunnels which were designed to reduce excessive landscape scarring. They are so beautiful! You will encounter old farmsteads, an old grist mill, hiking trails, waterfalls, scenic overlooks to park and take in the beauty. You might see a bear, fox, coyote, skunk or another animal. What you will not see are power lines, traffic lights, billboards, or any other sign of commercialism. It is a two-lane highway and the speed limit is never more than 45 mph.


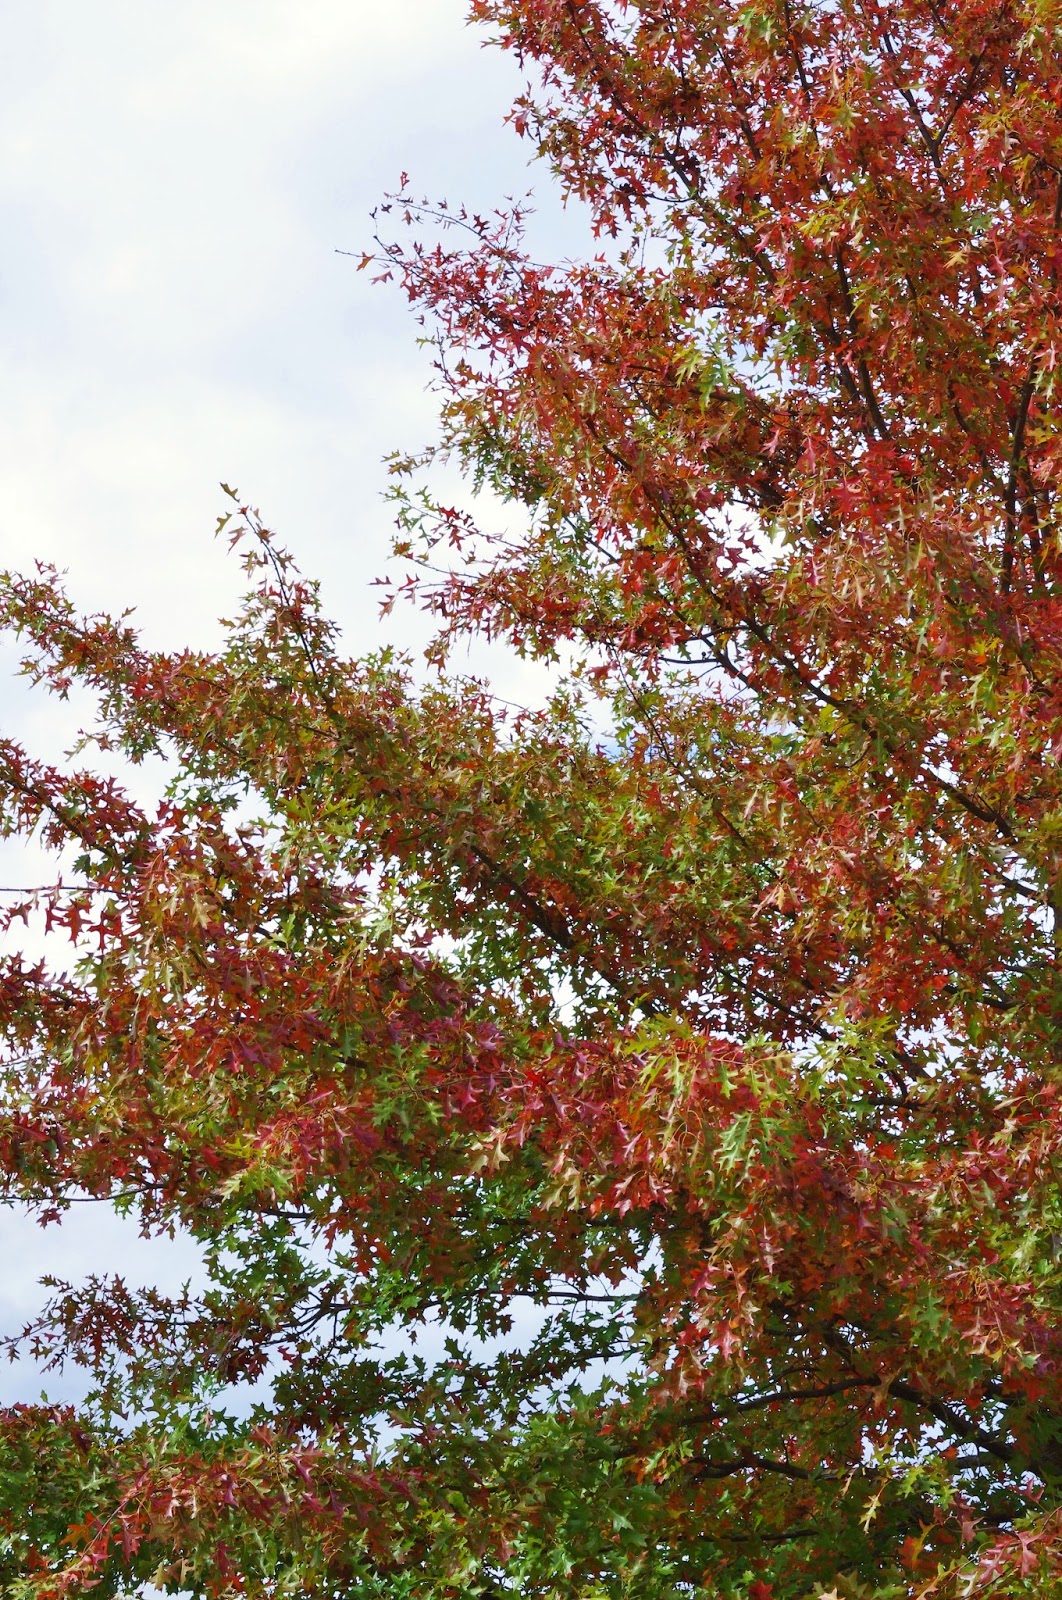
Lucky for us, there is an entrance to the Parkway just about 5 miles from our home. We have taken a few drives in the past couple of weeks to enjoy the glorious fall colors. This has been an especially brilliant fall.


I am not equipped to photograph the sweeping and breath-takingly beautiful mountain vistas, but I recently packed a picnic and shot some photos around a picnic area where we lunched. It was a glorious day. The skies were brilliant blue with fluffy white clouds floating about. The air was crisp but quite warm in the sun.


I made Muffuletta sandwiches because they are delicious and travel well.


Muffuletta Sandwich
1 round loaf Italian bread
1/4 pound each thinly sliced:
   Genoa salami
   Cooked ham
   Mortadella
   Mozzarella cheese
   Provolone cheese
Olive Salad:
   1 jar Giadeniera, chopped
   1 1/2 cups pimiento stuffed olives, chopped
   3 - 4 cloves garlic, crushed
   1 Tbsp. chopped fresh oregano
   1/2 tsp. crushed red pepper flakes
   Freshly ground black pepper, to taste
   1/4 to 1/2 cup olive oil

Combine the olive salad ingredients and stir well. Cover and refrigerate for several hours. Stir well again before applying to the sandwich.

Cut the bread in half around the horizon. Tear away some of the fluffy interior to hollow out the bread a bit. (Save to use for bread crumbs later).

Generously spread olive salad on each half of the sandwich. Layer the meats and cheese. Close the sandwich and press down. Wrap tightly and refrigerate until later or serve right away, cut into wedges.

Leftover sandwich wedges and leftover olive salad keep well.


Thursday, November 14, 2013

Pound Cake with Gingerbread Swiss Meringue Buttercream Rosettes


I took a cake decorating class at our local community college. Nineteen people started the class and ten finished it. People gave differing reasons for being there; some wanted to earn money making cakes. The instructor is a professional baker who specializes in wedding cakes. Myself, I was looking for a social outlet, creativity, and fun.


Some of my former coworkers would probably find the concept of me, Rocquie, taking a cake decorating class confounding. You see, I have always shunned those supermarket birthday cakes everyone at the office loves. You know the ones, the garish, brightly colored concoctions made completely of sugar, and artificial flavorings and colors that taste horrible. And let me not get started on the grease factor. (I have cleaned the break room after those birthday parties--it takes much soap and hot water to clean that grease frosting off the cake knife). 

I have always wanted to say that.

Now I have the tools and skills to pipe. I can pipe out those beautiful deviled eggs, that basket weave of mashed potatoes on the shepherd's pie, the twice baked potatoes, and most importantly and what I really wanted to learn, is decorating beautiful Christmas cookies. 

For my final project, I made an old fashioned pound cake (posted here) and piped rosettes with gingerbread flavored Swiss meringue buttercream frosting. No artificial anything. 


Gingerbread Swiss Meringue Buttercream Frosting
4 ounces liquid pasteurized egg whites
10 ounces dark brown sugar
Pinch of salt
1 tsp. molasses
12 ounces soft unsalted butter
2 tsp. vanilla
1 1/2 tsp. ground ginger
1 1/2 tsp. ground cinnamon
1/4 tsp. ground allspice
Pinch of ground cloves
1/2 tsp. freshly grated nutmeg

Whisk together the sugar and egg whites. Add pinch of salt.

Heat, whisking constantly, with mixing bowl over simmering water until mixture reaches 160 degrees or until all of the brown sugar has dissolved.

Place the mixing bowl on mixer fitted with whisk attachment and beat on high for 10 minutes.

Switch to paddle attachment, add the butter, and mix on low speed until thick.

Add vanilla and spices; continue to beat on low speed until combined.

Wednesday, October 30, 2013

Braised Greens with Apples


One last apple recipe to close out October, this time savory.

I have been testing out some recipes for the much smaller Thanksgiving we are hosting this year. I will be making all our traditional foods in some new ways. Like these greens.

We both loved these! I cooked these greens, which were a combination of Swiss chard, ruby chard, and kale with apples and apple cider vinegar. I served them with cornbread casserole (recipe following) for a simple and satisfying supper.

Braised Greens with Apples
(From The Fresh Honey Cookbook by Laurey Masterton)
2 T. olive oil
1 medium onion, chopped
2 cloves garlic, sliced
1/4 cup apple cider vinegar
2 Tbsp. honey
2 tart apples, unpeeled, cut into chunks
3 pounds mixed braising greens, cut into large pieces, thick stems removed
Sea Salt and Freshly Ground Black Pepper, to taste

Heat the oil in a large pan over medium heat. Add the onion and garlic and saute until they start to brown, about 5 minutes.

Add 1/2 cup water, the vinegar, honey, and apples, stirring to combine.  Add the greens and stir, folding in the uncooked greens on the top as the ones in the bottom of the pan wilt, until all the greens have been incorporated.

Lower the heat to a simmer, cover, and cook for 5 to 30 minutes, depending on the type of greens. Denser and more mature greens like collards will need to cook longer.

Taste, and add salt and pepper, if desired. Too much will mask the sweetness of the greens. 


Friday, October 25, 2013

Fantastic Apple Bread


 This tasty apple bread was so easy to make. I love simple and delicious recipes for made from scratch foods which are simple to put together, don't involve machinery, and don't make a lot of mess to clean up. This is one of those. 


This moist, sweet and spicy bread is perfect for brunch or for dessert. I served it with quiche and it made a very satisfying light meal. 

The crunchy crust that forms while baking is the best part!


Fantastic Apple Bread
3 - 4 medium fresh apples, peeled cored and sliced
1/2 cup light vegetable oil
1/4 cup milk
2 eggs, lightly beaten
1 tsp. vanilla
1/2 - 1 cup sugar, to taste
2 cups flour
1 Tbsp. baking powder
1/2 tsp. salt
1 tsp. cinnamon
pinch of freshly grated nutmeg, optional
 
Preheat oven to 350 degrees. Grease and flour a standard loaf pan.
 
Combine apple slices, oil, milk, and beaten eggs in a large mixing bowl and stir well. Add flour, baking powder, salt, cinnamon and nutmeg, if using. Stir again, by hand, until well mixed.
 
Pour batter into prepared pan and bake for 1 hour, or until a toothpick inserted in the center comes out clean. Allow to cool for 10 - 15 minutes in pan.


Wednesday, October 16, 2013

Sour Cream Apple Pie with Streusel Topping


This recipe may look complicated, but it is really as easy as. . .um, pie. Easy as pie, that's it.  I tried to find out who should be credited for it, but no luck. Many claim this pie as their own, including Gourmet Magazine and Martha Stewart. I have seen credit given to the Amish which seems more likely to me.

The sour cream and eggs are unusual for an apple pie, but really they only serve to uplift and glorify the apple slices. The pie doesn't taste overly rich or custardy. It is a very light apple pie--not too heavy or cloyingly sweet. 


If your knife skills need honing, apples are a great way to practice. They are easy to peel with an ordinary vegetable peeler, they slice easily even if you don't have a great or a really sharp knife, they are fun to nibble on while you work, and they don't make you cry. 

Use any apple or a mix of apples for this pie. The fresher your apples, the better your pie will taste. I used my preferred apple--Gala, which is quite sweet so I didn't use much sugar. Taste and add sugar as desired.


Sour Cream Apple Pie

Fit your favorite pie crust into a 9-inch deep pie dish. Preheat oven to 350 degrees.

Streusel Topping
3 Tbsp. butter, softened
1/3 cup sugar
1 tsp. cinnamon
2 Tbsp. flour

Mix together until well combined. Cover and chill until ready to use.

Apple Filling
1 1/3 cup sour cream
1/3 cup (or more to taste) sugar
1/4 tsp. salt
2 tsp. vanilla
2 eggs
3 Tbsp. flour
4 -5 large apples, peeled, cored, and thinly sliced

Whisk together the sour cream, sugar, salt, vanilla, eggs and flour until smooth. Add the apples and stir together.

Spoon the filling into the prepared pie crust and crumble the streusel topping evenly over it. Bake for 1 hour to 1 1/4 hours. Cool completely before slicing.


Sunday, October 13, 2013

Applesauce - The Easy Way (A re-post from 10-9-2009)

Since I originally posted this, I have been using Gala apples for making applesauce and apple butter. I find that they are perfectly sweet, without adding sweetener of any kind.


If you want to take advantage of the season's bounty and make your own applesauce, do yourself a favor and get a Foley food mill. It is an old timey, inexpensive, uncomplicated, piece of equipment that couldn't be easier to use. Plus you'll feel like Miz Boone using it and it doesn't make noise.

You don't even have to peel or core the apples, nor worry about the seeds. Simply wash the apples well, with a vegetable brush, then cut them into quarters, and drop them into a pot. Add about a quarter inch of water and simmer, about 10 to 15 minutes, until the apples are soft.


Place the softened apples into the food mill and turn the handle. Viola, applesauce! Taste, and depending on the apples used, you may want to sweeten it. Because I used half Granny Smith apples, I added some sugar. Also I reheated my applesauce because I was canning it.

Making applesauce this way, utilizing the entire fruit, retains all the pectin and nutrients of the apples. Plus, there is suprisingly little waste.

The applesauce is very smooth and has an almost creamy mouth feel.

Tuesday, May 28, 2013

Baby Butternut Squash Souffle


Now what kind of holiday did I think this was? Thanksgiving? No, Memorial Day, the official kick off to summer. Well, the thing is my excuses are: I saw these adorable, organic, baby butternut squashes for an excellent price while I was shopping. We have been having a very cool and wet spring, so I still needed warming foods. And, we toast marshmallows in summer, right? So mine just happened to be on top of a casserole.


I was originally going to stuff the squashes, which I thought would really add to their cuteness factor. Once I cut them open and de-seeded them, I decided that was not such a good idea. So I placed them face down on a buttered baking sheet and baked them until tender--about 30 minutes. Then one thing led to another. . .

I loved this!


Butternut Squash Souffle
3 pounds butternut squash, baked until tender
1 small (4 1/2 oz.) can evaporated milk
1/4 cup brown sugar
4 Tbsp. butter, softened
2 eggs, lightly beaten
Salt and freshly ground pepper to taste
1/2 bag (10 oz.) mini marshmallows

Preheat oven to 350 degrees and butter a 2-quart casserole dish.

Combine squash, milk, brown sugar, butter, egg, and salt and pepper. Mix together very well, with an electric mixer. Pour into prepared dish and bake for 30-35 minutes, until set. Remove from oven and top with marshmallows. Return to oven and bake an additional 10 minutes until marshmallows are well browned. Let set about 10 minutes before serving.


Sunday, December 4, 2011

Old Fashioned Southern Sweet Potato Pie


Almost every recipe I see for Sweet Potato Pie calls for the addition of cinnamon, cloves, ginger, nutmeg--the pumpkin pie spices. As a girl growing up in Alabama, I don't remember my Grandmother's and my Aunties' Sweet Potato Pies tasting like my Mother's pumpkin pie (and she makes the best).

Aunt Ruby made the best Sweet Potato Pie. She also made the best ice tea, which she made with loose tea then strained into a pitcher. Hers was the perfectly sweetened tea, not too sweet, just right. And she served it over crushed ice.

I remember her sweet potato pie simply tasting like sweet, buttery, vanilla scented sweet potatoes. Delicious!

Her recipe calls for the addition of light Karo syrup. Karo syrup is an old-fashioned corn syrup, used to soften texture, add volume, prevent crystalization of sugar, and enhance flavor. It is not to be confused with the high fructose corn syrup of today, though still widely available in grocery stores.


Aunt Ruby's Sweet Potato Pie
1/2 cup butter
1/2 cup light brown sugar
1/4 cup light Karo syrup
2 eggs, beaten
1 can evaporated milk
3 cups cooked, mashed sweet potatoes
2 tsp. vanilla
1/4 tsp. salt
1 unbaked 9-inch pie crust
Nutmeg (optional)

Preheat oven to 375 degrees. Cream butter, brown sugar and syrup together. Add eggs and stir. Add sweet potatoes and mix well. Stir in the milk, vanilla and salt, making sure all ingredients are thoroughly mixed. Pour into the pie shell and bake 40 minutes, or until a knife inserted in the center comes out clean. Dust top with freshly grated nutmeg if desired.

Friday, December 2, 2011

Cornbread Dressing with Fresh and Dried Fruit


I had to report for Jury Duty this morning but was dismissed early. I could have gone into work, but decided to blow it off. (Shh! Don't tell the boss!)  I had already prepared, workwise, to have the day off. I made sure my office was in order and that I was prepared for Monday. And besides,  I don't like to walk into an office that is already humming. I like being the first one in. 

Each morning, I arrive early, open the gate, unlock the doors, turn off the alarm, turn on the lights, adjust the thermostat, make the coffee.  I put my lunch in the fridge, turn on my computer, check my email, and prepare for my work day. All while it is still and quiet. By the time my co-workers begin to arrive, I am well into the day.

Today, I decided to come home and give my blog some love! I miss my blog and my blog friends. I never dreamed my job would take so much of my energy.  Three evenings, after work, I go to the gym. Every night I cook dinner so we can enjoy delicious and healthful meals each day. I take my lunch to work every day. All these things are very important to me.

After dinner, and after the kitchen is packed away for the night, I sit down in front of my computer, in my very comfortable office chair, with the intention of blogging . . . and promptly fall asleep. 

~ * ~ * ~ * ~

We had, for varying reasons, a very quiet Thanksgiving. I did not bake a turkey, but rather a ham. And I fashioned my menu much like a brunch. Among other things, I made a Cheese Grits Souffle, Angel Biscuits,
Tomato Gravy, and an old fashion Sweet Potato Pie. 

I did not make my usual Southern family favorite dressing. Instead I made this recipe from the November, 2006 edition of Bon Appetit. I have made this recipe a few times before, usually for New Year's.  It is very moist and flavorful and I think it goes especially well with ham.

Cornbread Dressing with Fresh and Dried Fruit
Buttery cornbread (recipe below)
1/2 cup butter
4 cups chopped onions
4 cups chopped, unpeeled apples
2 cups chopped celery with leaves
24 pitted prunes, diced
12 dried apricot halves, diced
1 Tbsp. sage
1 tsp. salt
1 tsp. freshly ground black pepper
1/2 tsp. thyme
1 cup chicken broth

Cut the cornbread into 1-inch cubes. Spread onto a sheet pan and bake in a 250 degree oven, to dry out some, while you prepare the rest of the ingredients.

Melt butter, in a large skillet over medium heat. Add onions, celery, and onions and saute about 10 minutes, until beginning to soften. Scrape the vegetables into a large bowl. Add prunes, apricots, sage, salt, pepper, and thyme. Add the cornbread cubes and toss until evenly combined.

Pour mixture into a well buttered 13x9 inch baking dish; pour broth evenly over. Place into a preheated 375 degree oven. Bake until heated through and the top begins to form a crust, about 40 minutes.

Buttery Cornbread
1 1/3 cups coarse-ground yellow cornmeal
1 cup flour
1/4 cup sugar
2 tsp. baking powder
1/4 tsp. salt
1 1/4 cup buttermilk
9 Tbsp. melted butter
2 eggs, beaten

Place all ingredients into a large mixing bowl and blend together thoroughly, but don't over mix. Pour into a well buttered 9x5x3-inch loaf pan and bake at 375 degrees for 40 minutes, until a tester inserted in center comes out clean. Cool in pan for 5 minutes then turn bread out onto a rack until completely cooled. 


Delicious the next day topped with an egg.

Sunday, October 30, 2011

Applesauce Muffins - 2 Ways


After my boss received a gift of fresh, locally grown apples, he took them to the break room to share with the staff. I brought home several of these apples with the intention of making muffins to share at work. And of course I had to make enough muffins to include Pritchard Parker.

The first batch I made had golden raisins and pecans, with a drizzle of confectioner's sugar glaze. I thought they were very pretty, but when Pritchard Parker tasted one he said, "That's different".  Now I have to say that Pritchard Parker had gotten home from work very late and was quite tired when he said that. He was not really in a place to offer a fair critique and I didn't pursue it.

Different? Just to be safe, I decided to go with another recipe for the next batch. This time I skipped the raisins and used brown sugar and toasted walnuts with  a sugary crunch for topping.

Both recipes begin by making applesauce.


Applesauce Raisin Muffins
1 3/4 cups flour
1/4 cup sugar
2 tsp. baking powder
1 tsp. cinnamon
1/4 tsp. freshly grated nutmeg
1 egg
1/2 cup milk
1/4 cup vegetable oil
3/4 cup unsweetened applesauce
1/4 cup golden raisins
1/4 cup chopped pecans

Stir together the flour, sugar, baking powder, and spices. In another bowl, stir together the egg, milk, vegetable oil, and the applesauce and mix well. Stir the dry mixture into the wet until just combined. Stir in the raisins and nuts.

Spoon into greased muffin cups and bake at 400 degrees for 12 to 15 minutes. Let them cool slightly then remove to a wire rack to cool completely. If desired, top with a glaze made of 1/2 cup confectioner's sugar, 1/2 tsp. vanilla, and 1-2 Tbsp. milk or cream.  Add an additional sprinkling of freshly grated nutmeg.


Applesauce Spice Muffins
(Gourmet Magazine, November 2003)
1 1/2 cups flour
1 1/2 tsp. baking powder
1/2 tsp. baking soda
1/2 tsp. cinnamon
1/2 tsp. ground allspice
1/4 tsp. freshly grated nutmeg
1/4 tsp. salt
2 large eggs
1 cup light brown sugar
1 stick (1/2 cup) plus 3 Tbsp. unsalted butter, melted
1 cup unsweetened applesauce
1 cup toasted walnuts, coarsely chopped

Topping:
2 Tbsp. Turbinado (or regular granulated) sugar
1/4 tsp. cinnamon
1/4 tsp. ground allspice
1/4 tsp. freshly grated nutmeg

Stir together flour, baking powder, baking soda, spices, and salt in a bowl. Whisk together eggs and brown sugar in a large bowl until combined well, then add butter, a little at a time, whisking until mixture is creamy. Stir in applesauce, then fold in flour mixture until flour is just moistened. Stir in nuts and divide batter among greased muffin cups.

Stir together the topping ingredients and sprinkle on top of the muffins. Bake at 400 degrees until muffins are puffed and golden, about 20 minutes. Cool in pan on a rack 5 minutes, then remove muffins from pan and cool completely.


These are the muffins I took to work.


Tuesday, October 18, 2011

Beets in Citrus Sauce


We love vegetables and beets are no exception. I think some people are put off by their gaudy magenta hue, but even as a kid, I loved that color and felt very attracted to beets. Also, it is hard to imagine by looking at the hard, crunchy, gnarly, and often hairy exterior of a beet that it could ever cook into a vegetable so sweet and buttery textured.   

Beets are a nutritional power-house; another reason to love them.  They can be juiced, grated raw as a topping for salads, oven roasted, grilled, or steamed, all with delicious results.

I have made Beets in Citrus Sauce many times over the years. The addition of the lemon and orange really brighten the flavor, the small amount of sugar takes away the earthy flavor some people find objectionable. And the cloves add a distinctly fall flavor.

Beets in Citrus Sauce
(adapted from The Vegetarian Epicure by Anna Thomas)
1 1/2 to 2 lb. young beets
1 1/4 cups liquid from beets
1 lemon
1 Tbsp. orange peel, freshly grated
2 Tbsp. sugar
1/2 tsp. ground cloves
2 Tbsp. frozen orange juice concentrate
1 1/2 Tbsp cornstarch
1 Tbsp. butter

Cook the beets whole, in simmering water, until just tender. Drain, reserving liquid, peel and slice thin. Pour liquid from the beets into a pot, add the grated peel and the juice of 1 lemon, the grated orange peel, sugar, salt, cloves, and the frozen orange juice concentrate. Dissolve the cornstarch in just enough water to make a smooth paste and add that also.  Beat the mixture lightly with a whisk and cook until it becomes clear.

Add the sliced beets and the butter, heat it through, correct the seasoning, and serve very hot.


Saturday, October 1, 2011

Grilled Ratatouille


Three weeks ago, a tractor-trailer truck with a load of locally grown tomatoes, over-turned on one of our narrow, steep and winding rural roads.  Tomatoes were all over the place! Many, many boxes of the tomatoes were rescued but were deemed (by whatever authority) unsaleable, due to the accident. Many were donated to local food banks and soup kitchens. Lucky for me, I happened to be in the right place at the right time, and found myself the happy recipient of two 25 pound boxes of beautiful, large and plump Roma tomatoes.  No one wanted to see these tomatoes wasted.  (And no one was injured in the accident).

I canned one box of them for the winter. With the other, I have made all kinds of tomato-ey things--tomato sauce, tomato soup, pizza, salsa, grilled cheese with tomato sandwiches, two pans of oven dried tomatoes, and I still have a nice bowl full of them to finish off this weekend.

Another thing I made is Ratatouille, which is a delicious dish to make and eat in very late summer to early fall, when the fresh, local, tomatoes, eggplant, bell peppers, and squashes are still available. Ratatouille can be eaten cold with crackers and cheese when the weather is balmy. Or it can be treated as a hot and comforting stew for blustery autumn evenings, served with french bread and brie. 

There are many ways to make Ratatouille, and here is one.

Grilled Ratatouille
3 large onions, roughly chopped
3- 4 plump cloves garlic, chopped
2 bell peppers, any color, quartered, seeds removed
8 Japanese eggplant, split in half lengthwise
6 summer squash, split in half lengthwise
4 very large ripe tomatoes, peeled and coarsely chopped
Salt and freshly ground black pepper
1 Tbsp. fresh rosemary, finely chopped
Olive Oil

In a large soup pot, cook onions, in olive oil, over medium low heat, until tender. Meanwhile, drizzle peppers, eggplant, and squash with olive oil, and salt and pepper them. Grill until tender. Chop the grilled vegetables to desired size and add to the pot with the onions. Add the garlic. Stir together, and simmer for a few minutes. Finally add the chopped tomatoes and the fresh rosemary. Cover and simmer for about 30 minutes. Taste and adjust seasonings.

Sunday, October 31, 2010

Root Vegetables with a Pot Roast

Onion, Turnips, Celeriac, Carrots, Parsnips, and Rutabaga


Root vegetables are not the most beautiful of vegetables, but I love their earthy, sweet flavor, and their health giving qualities. 

Rutabagas, turnips, parsnips, celeriac, and carrots are all excellent sources of potassium (proven to help regulate blood pressure) and good sources of vitamin C, magnesium, and folic acid.  Additionally, carrots are an excellent source of vitamin A.  Onions have been credited with so many medicinal qualities they could be called a panacea.

Root Vegetables with a Pot Roast
1 (approx.) 3 lb. pot roast
Salt and pepper
2 Tbsp. canola oil
1 1/2 cups brewed strong coffee
1 1/2 cups water
Several stems fresh thyme
2 bay leaves
1 large rutabaga, peeled and sliced into "french fries"
2 medium turnips, scrubbed and diced
3 parsnips, peeled and sliced
2 carrots, peeled and sliced
1 onion, sliced
1 small celeriac, peeled and sliced

Heat the oil in a large soup pot or dutch oven over medium high heat.  Salt and pepper the pot roast on all sides.  Place the roast into the hot pan; sear and brown on all sides.  Once the roast is thoroughly browned, remove from heat for a few minutes.  Add the hot coffee and the water, along with the thyme and bay leaves.  Return to heat, bring to a boil, reduce heat and simmer until the roast is very tender, about 1 1/2 to 2 hours.

Remove the roast to a platter and keep warm.  Discard the thyme stems and bay leaves, and add the prepared vegetables to the simmering stock.  Salt and pepper to taste.  Cook, covered for about 20 to 30 minutes, until the vegetables are tender.  Arrange the vegetables around the roast.  Serve with french bread and the au jus.

Sunday, October 24, 2010

Cream Cheese (Candy Roaster) Squash Bread with Toasted Pecans

 This was originally a Southern Living recipe for Banana Bread.  I had made several Candy Roaster Squash pies, had some leftover puree, froze some for later, and decided to use the balance for bread.  Originally, I had in mind using the flavors of orange and fresh ginger.  After looking at a number of Squash Bread and Pumpkin Bread recipes, nothing was really ringing my chimes.  Then I remembered the banana bread recipe my husband loves so much, which is flavored with cream cheese and toasted pecans.

Don't skip toasting your pecans because it really does add another level of delicious flavor and aroma to the bread. Some people toast their nuts in the oven.  I toast mine in a skillet over low heat, stirring occasionally. Pull the nuts from the heat as soon as you smell them because once they become fragrant, they will burn very quickly.

Also, I did use a Candy Roaster squash, but acorn, butternut, pumpkin, or any other winter squash should work just fine.

Cream Cheese (Candy Roaster) Squash Bread with Toasted Pecans
3/4 cup butter, softened
8 oz. cream cheese, softened
1 1/2 cups sugar
2 eggs
3 cups flour
1/2 tsp. baking powder
1/2 tsp. baking soda
1/2 tsp. salt
1 1/2 cups squash puree
1 cup pecans, toasted and coarsely chopped
1/2 tsp. vanilla

Preheat oven to 350 degrees. Butter and flour two 8x4 inch loaf pans.

Beat butter and cream cheese at medium speed with an electric mixer until creamy.  Gradually add sugar, beating until light and fluffy.  Add eggs, 1 at a time, beating  just until blended after each addition.

Combine flour and next 3 ingredients; gradually add to butter mixture, beating at low speed just until blended.  Stir in squash puree, pecans, and vanilla.  Spoon in prepared pans. 

Bake for 1 hour or until a long wooden pick inserted in center comes out clean and sides pull away from pan.  Cool bread in pans on wire racks 10 minutes.  Remove from pans, and cool 30 minutes on wire racks before slicing.


And here are some other interesting and pretty squashes, pumpkins, and gourds I saw on my trip to the Farmers Market to find a Candy Roaster Squash.